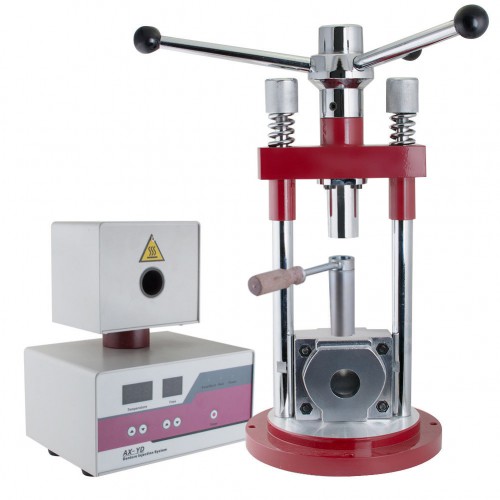
Dentures processed with the AX-YD flexible denture injection machine from Heraeus Kulzer offer excellent fit, occlusion and esthetics. Engineered for heat- and auto-cure acrylics, the system offers some distinct advantages. With the Palajet, a Duoflask and Palapress® vario acrylic, it’s possible to process two premium dentures in one flask, doubling efficiency while doing the same amount of work as traditional flasking. Because of the unique amen-free makeup of Palapress vario, the case can be processed in 30 minutes with no residual monomer. Palapress vario is dense, plaque resistant, color stable and has no peroxide that can burn a patient’s tissue, giving you the speed of cold-cure acrylic without its drawbacks.
Step 1: This wax try-in has been approved by the patient and doctor and the dentures are ready for processing.
Step 2: Apply a thin layer of Vaseline to the top and bottom half of the DuoFlask and on the stone models. Place both arches in the lower half of the flask and check for clearance.
Step 3: Invest both arches in the lower half of the flask, bringing the plaster to the edge of the wax; allow plaster to set.
Step 4: After the plaster has fully set, sprue both arches for injection. Place a main feeder sprue from the injection hole to both arches and a main connector on the opposite side of the flask. Run a small vent sprue that connects to both arches and exits the flask through the vent hole. Next, apply a separator to the stone to allow for investing of the top half of the flask. I use HiSep from Hi-Tec Dental Products because it’s efficient and creates a perfect separation between stone-to-stone areas. I pour the HiSep onto the plaster stone areas and blow the excess off immediately.
Step 5: Secure the top half of the flask by tightening the flask bolts; it’s now ready to be invested. I use FloFlask, a stone blend from Hi-Tec Dental Products that has the strength of flasking stone combined with the working properties of flow
Stone; it picks up minute details very accurately. Mix and pour (vibration optional) the FloFlask to the top of the flask.
Step 6:Let the FloFlask set for 20 minutes and then place the flask in the boilout tank.
Step 7: After 10 minutes in the boilout tank, open the flask and clean any remaining wax from the flask. Place the diatorics and post dam. Clean the flask one more time and then apply the separating agent; I use Aislar® from Heraeus Kulzer.
Step 8: I use a dry cotton swab to remove the excess separator from the exposed teeth. Then I clean the teeth again with a cotton swab dipped in monomer, which removes any remaining particles.
Step 9: Using Heraeus Kulzer’s measuring device, measure the exact ratio of polymer to monomer for the case. The device has two vials: the larger one on the left is for polymer and the smaller, right vial is for monomer. If processing one arch, pour the polymer and monomer up to the first line; if processing two arches, pour to the second line.
Step 10: Mix the polymer and monomer and transfer the mixed acrylic to the injection vial.